

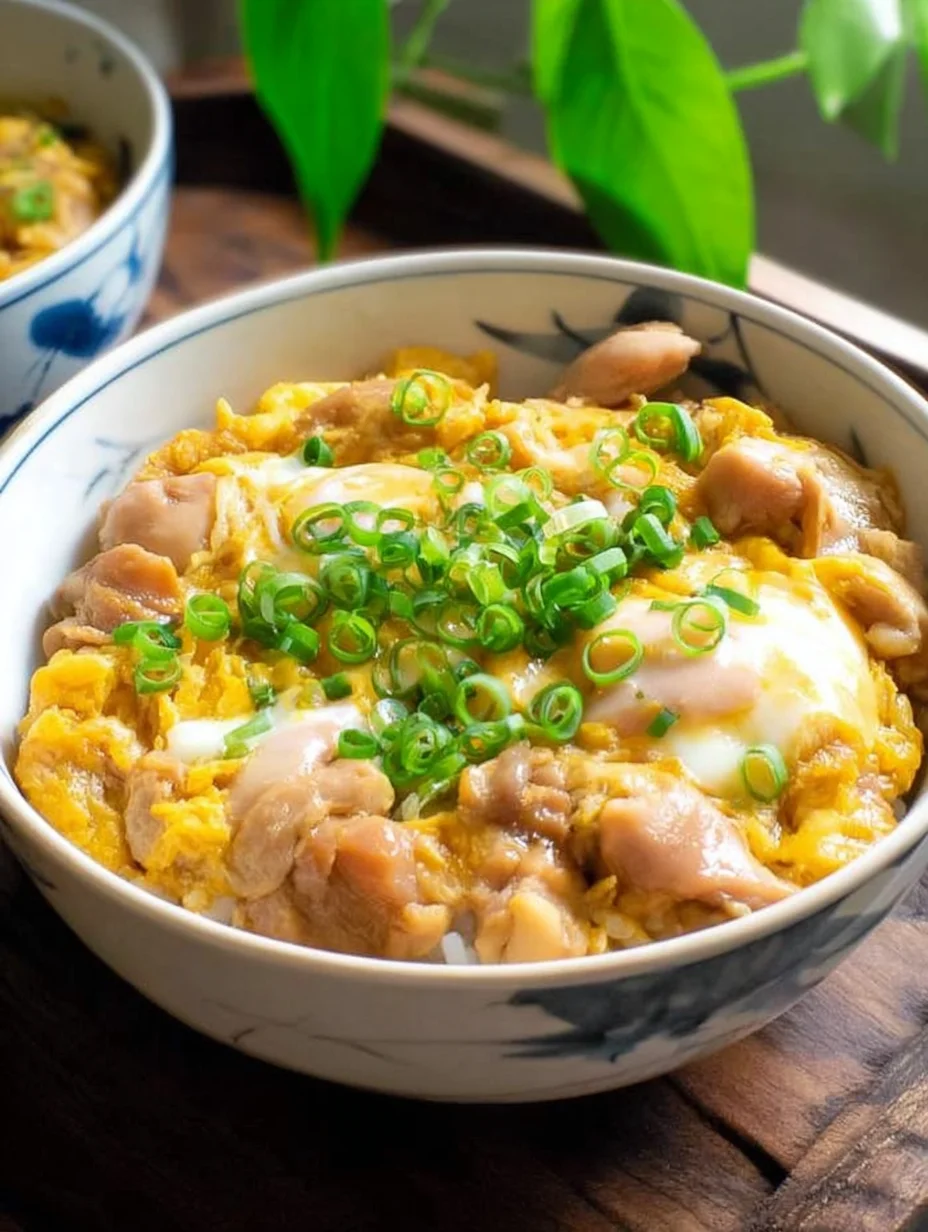
Have you ever craved a comforting bowl of food that feels like a warm hug from your favorite Japanese spot? That’s exactly what Oyakodon delivers – a classic donburi dish featuring tender chicken, silky eggs, and sweet onions simmered in a savory broth, all piled over fluffy rice. I’ve been making this Oyakodon at home for years, and it’s become my go-to weeknight meal because it’s ready in under 30 minutes. The name “Oyakodon” literally means “parent and child” rice bowl, referring to the chicken and egg combo, which always makes me smile. If you’re looking to bring authentic Japanese flavors to your kitchen without the fuss, this recipe is for you. Let’s dive in and get you cooking your own delicious Oyakodon tonight!
In my experience, the magic of Oyakodon lies in its simplicity – just a handful of ingredients that come together in one pan for that umami-packed sauce. I remember the first time I tried it in Tokyo; it was love at first bite, and recreating it at home has been a game-changer for busy evenings. Whether you’re a fan of quick Asian-inspired meals or just want something hearty yet light, this Oyakodon will win you over. Stick around, and I’ll share all my tips to make your version just as irresistible.
Key Takeaways:
- Oyakodon is a quick Japanese comfort food that’s perfect for family dinners, combining chicken and eggs in a flavorful broth.
- This recipe takes only 20-25 minutes from start to finish, making it ideal for weeknight ease.
- The savory-sweet taste of Oyakodon comes from a simple dashi-based sauce that soaks into the rice beautifully.
- Use fresh eggs and high-quality soy sauce for the silkiest texture in your Oyakodon.
- Store leftovers in the fridge for up to two days and reheat gently to keep the eggs tender.
Why You’ll Adore This Oyakodon
Quick and Effortless Prep: Imagine coming home after a long day and whipping up a restaurant-quality meal in no time – that’s the beauty of this Oyakodon. With minimal chopping and one-pan cooking, you won’t spend hours in the kitchen. I love how it fits seamlessly into my routine, leaving more time for enjoying the meal with loved ones.
Grab This Chef Knife Now - Almost Gone!

- Stays Razor-Sharp: Ice-hardened blade keeps its edge longer than ordinary knives
- Superior Grip Control: Unique finger hole design gives you perfect balance and safety
- Built to Last a Lifetime: Premium stainless steel blade with elegant beech wood handle
- ✓ Finally, a knife that stays sharp and feels comfortable in my hand
- ✓ Professional quality without the premium price tag
- ✓ Makes meal prep faster and more enjoyable
⏰ Only a few items left in stock - order soon
Comfort in Every Bite: There’s something so soothing about the tender chicken nestled with runny eggs and onions in that glossy sauce. This Oyakodon hits all the right notes of savory, sweet, and umami, making it feel indulgent without being heavy. It’s the kind of dish that warms you from the inside out, especially on cooler evenings.
Versatile for Any Palate: Whether you’re feeding picky eaters or hosting friends, Oyakodon adapts easily with a few tweaks. The base flavors are universally appealing, and I’ve seen even kids devour it. What I find interesting is how it balances richness with lightness, keeping everyone coming back for seconds.
Budget-Friendly Family Favorite: Using everyday ingredients like chicken, eggs, and rice, this Oyakodon won’t break the bank. It’s nourishing and satisfying for the whole family, and leftovers make lunch a breeze. Let’s be honest, who doesn’t love a meal that’s both economical and delicious?
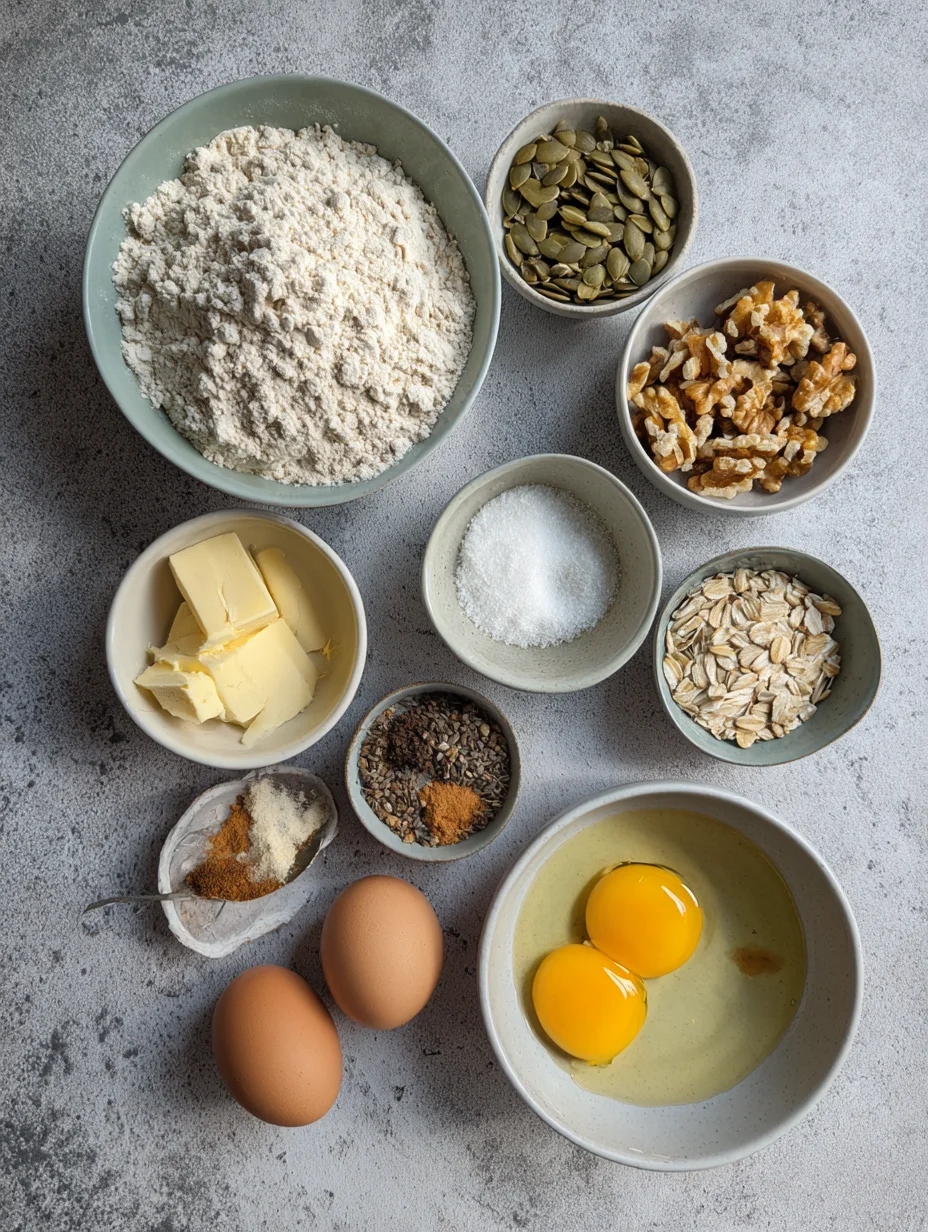
Essential Ingredients for Oyakodon
Chicken Thighs: Boneless, skinless chicken thighs are the star protein here, offering juicy tenderness that doesn’t dry out during cooking. I prefer thighs over breasts for Oyakodon because they absorb the sauce beautifully and add that subtle richness. Cut them into bite-sized pieces for even cooking, and you’ll get that melt-in-your-mouth texture every time. Their mild flavor lets the soy-mirin broth shine through.
Eggs: Fresh eggs are crucial for the custardy topping that defines Oyakodon – beaten just enough to create soft, ribbon-like strands. In my experience, using room-temperature eggs ensures they set gently without overcooking. They bind everything together, adding creaminess and a nutritional boost to this simple dish. Don’t skip the slight beating; it prevents lumps and keeps the Oyakodon silky.
Onions: Thinly sliced onions provide a sweet, mellow base that caramelizes lightly in the broth, enhancing the overall depth of Oyakodon. Yellow or sweet onions work best, as they soften quickly without overpowering the other elements. I’ve found that soaking them briefly in water reduces sharpness, making the final dish even more harmonious and approachable for beginners.
How to Make Oyakodon
Prepare the Broth and Simmer Onions
Start by combining dashi stock, soy sauce, mirin, sake, and sugar in a deep skillet over medium heat – this is the soul of your Oyakodon, infusing everything with that signature sweet-savory balance. Bring it to a gentle boil, then toss in the sliced onions and let them simmer until translucent and tender, about 5 minutes. The aroma will fill your kitchen, reminding you why homemade Oyakodon beats takeout every time. Stir occasionally to ensure even cooking, and adjust the heat to avoid boiling too vigorously. Here’s the thing: this step builds the flavor foundation, so don’t rush it for the best results.
Add Chicken and Cook Through
Once the onions are soft, add your bite-sized chicken pieces to the pan, spreading them out evenly for quick, uniform cooking. Let the chicken simmer in the broth for 6-8 minutes, turning occasionally until it’s opaque and cooked through – the juices should run clear when pierced. You’ll notice the chicken plumping up and soaking in all that umami goodness, which is what makes this Oyakodon so addictive. If the liquid reduces too much, splash in a bit more dashi to keep things saucy. Now, you might be thinking about tenderness; thighs are forgiving here, staying moist even if you’re multitasking.
Finish with Eggs and Serve
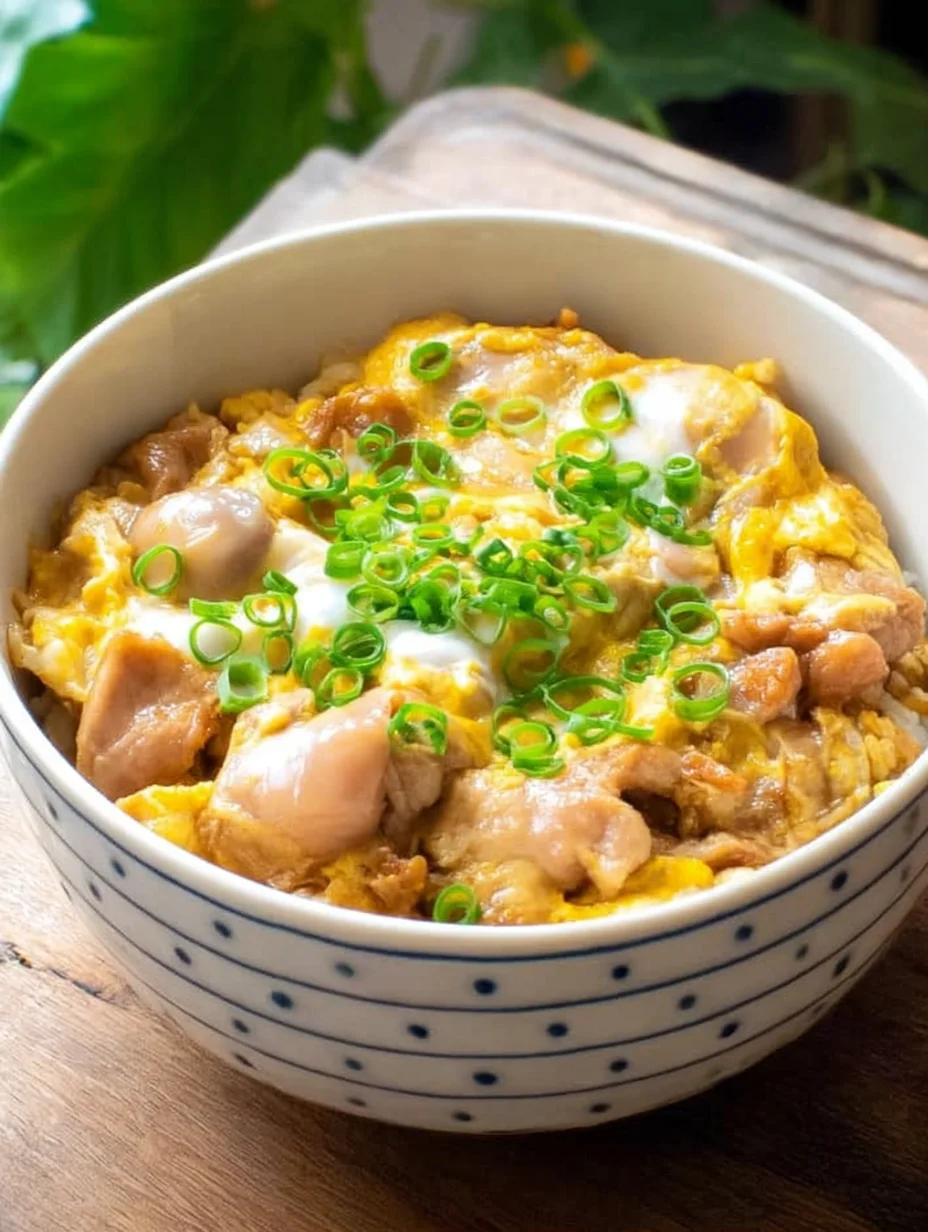
Reduce the heat to low and drizzle the beaten eggs over the chicken and onions in a circular motion, creating those beautiful wispy trails that are iconic in Oyakodon. Cover the pan and cook for 1-2 minutes until the eggs are just set but still soft – overcooking makes them rubbery, so watch closely. The steam will gently poach them, blending flavors seamlessly. For a pro touch like in our creamy garlic parmesan chicken recipes, garnish with chopped green onions. Spoon the mixture over hot steamed rice and serve immediately for the ultimate comfort bowl.
Ingredients
- 2 boneless, skinless chicken thighs (about 8 oz), cut into bite-sized pieces
- 1 medium yellow onion, thinly sliced
- 2 large eggs, beaten
- 1 cup dashi stock (or chicken broth)
- 2 tablespoons soy sauce
- 2 tablespoons mirin
- 1 tablespoon sake (optional, or substitute with water)
- 1 teaspoon sugar
- 2 cups cooked Japanese short-grain rice
- Chopped green onions or mitsuba for garnish
- Salt and pepper to taste
Serves: 2 | Prep Time: 10 minutes | Cook Time: 15 minutes | Total Time: 25 minutes
Oyakodon Instructions
- In a small saucepan, combine dashi, soy sauce, mirin, sake, and sugar. Bring to a boil over medium heat, stirring until sugar dissolves.
- Add sliced onions and simmer for 4-5 minutes until softened and slightly translucent.
- Add chicken pieces, spreading them evenly. Simmer uncovered for 6-8 minutes, until chicken is cooked through, turning halfway.
- Reduce heat to low. Pour beaten eggs over the mixture in a zigzag pattern. Cover and cook for 1-2 minutes until eggs are set but runny.
- Divide cooked rice into bowls. Top with the chicken-egg mixture and garnish with green onions. Serve hot.
Pro Tips for the Best Oyakodon
Use a Wide Pan: Opt for a shallow, wide skillet to allow the eggs to spread evenly and set properly without steaming too much.
Fresh Dashi Matters: Homemade or high-quality instant dashi elevates the flavor of your Oyakodon; store-bought works in a pinch but tastes flatter.
Grab This Kitchen Scale Now — Best Precision Pick!

- Razor-Accurate Every Time: Dual-increment precision down to 0.1g — perfect for baking, meal prep, and portion control with g, oz, ml, and fl'oz modes.
- Smart Removable Bowl Design: Detachable bowl doubles as a protective case for compact storage. Tare function lets you weigh ingredients in any container with zero fuss.
- Built for Everyday Convenience: Auto-zero, tare function, low battery alert, overload indicator, and 2-minute auto-off to extend battery life — all in a sleek stainless steel build.
- ✓ "Perfect for baking — precise, lightweight, and stores easily without wasting counter space"
- ✓ "A game changer! Weighing ingredients is now way more accurate than measuring cups"
- ✓ "Love the 0.1g precision and backlight — best food scale I've owned. Highly recommend!"
⏰ Only a few items left in stock - order soon
Don’t Overbeat Eggs: Lightly whisk to keep some structure in the strands for that authentic, silky texture in every bite.
You Must Know
- Oyakodon traditionally uses chicken thighs for their juiciness, but breasts can work if sliced thin.
- The dish is best enjoyed fresh, as the eggs can firm up upon reheating.
- Mirin adds sweetness without sugar overload; substitute with a pinch of honey if needed.
- Pair with miso soup for a complete Japanese meal experience.
How to Store Oyakodon
To keep your Oyakodon fresh, transfer leftovers to an airtight container and refrigerate within two hours of cooking – it stays good for up to two days. Avoid freezing, as the eggs can become watery upon thawing. For reheating, gently warm in a skillet over low heat with a splash of broth to revive the moisture, or microwave in short bursts, stirring midway. This way, your Oyakodon retains its comforting appeal without drying out.
Customizing Your Oyakodon
Feel free to swap chicken for pork or tofu to make your Oyakodon vegetarian-friendly, adjusting cooking times accordingly for tenderness. Add veggies like mushrooms or spinach for extra nutrition without overpowering the classic flavors – I’ve tried shiitakes, and they pair wonderfully. If you’re into spice, a dash of togarashi brings heat; for milder palates, stick to the base. Drawing from variations in our easy sesame chicken recipe, you can even incorporate sesame oil for a fusion twist that keeps things exciting.
What to Serve with Oyakodon
A simple green salad with sesame dressing cuts through the richness of Oyakodon perfectly, adding crunch and freshness. Miso soup or pickled cucumbers are traditional sides that round out the meal, providing balance without overwhelming the main dish. For drinks, green tea or a light Japanese lager complements the flavors nicely. If you’re feeling indulgent, steamed edamame makes a fun, protein-packed addition that everyone loves.
Frequently Asked Questions About Oyakodon
Can I make Oyakodon ahead of time?
While Oyakodon is best fresh, you can prepare the chicken and onion mixture up to a few hours ahead and store it in the fridge. Add the eggs just before serving to keep them soft and creamy. Reheating the base gently ensures the flavors meld without overcooking.
How long does Oyakodon last in the fridge?
Oyakodon keeps well in the fridge for up to two days when stored properly in an airtight container. Beyond that, the eggs may become tough. Always reheat thoroughly to maintain safety and taste.
Is Oyakodon gluten-free?
Traditional Oyakodon uses soy sauce, which contains gluten, but you can easily swap it for tamari to make it gluten-free. The rest of the ingredients are naturally gluten-free. Check labels on your mirin and dashi for hidden gluten as well.
What’s the difference between Oyakodon and Katsudon?
Oyakodon features chicken and eggs in a broth, while Katsudon uses breaded pork cutlet – both are donburi but offer different textures. Your Oyakodon will be lighter and quicker to prepare. For pork lovers, try adapting with tenderloin like in some Italian meatball recipes for inspiration.
Can I use chicken breast instead of thighs?
Yes, chicken breast works for Oyakodon if you slice it thin to prevent dryness. Cook it just until opaque to retain moisture. Thighs are preferred for their fat content, but breasts are a leaner option.
How spicy is Oyakodon?
Oyakodon isn’t spicy at all – it’s savory and mildly sweet from the mirin and sugar. If you want heat, add chili flakes or serve with wasabi on the side. This keeps the classic Oyakodon accessible for all ages.
Can I make Oyakodon in an Instant Pot?
Absolutely, use the sauté function for the broth and chicken, then switch to manual for 2 minutes on low pressure for the eggs. It’s a hands-off way to achieve tender results. Quick-release to avoid overcooking, much like our crockpot chicken parmesan soup.
Why is my Oyakodon watery?
Excess liquid often comes from too much dashi or not simmering long enough to reduce. Use the exact measurements and simmer uncovered. For thicker sauce in your next batch of Oyakodon, add a cornstarch slurry if needed.
Final Thoughts
From the first simmer to that final glorious spoonful, this Oyakodon recipe captures the essence of Japanese home cooking with ease and joy. I’ve shared it with friends and family, and it always sparks rave reviews – it’s that reliably delicious. Why not give it a try this week? Head to your kitchen, gather those ingredients, and treat yourself to a bowl of homemade Oyakodon that’ll have you hooked.